
Dogs with sensory loss, abnormal sensation, or hypersensitivity can benefit from a sensory re-education and/or desensitization plan (see Vital Vet Sensory Protocol below). The plan should be integrated as part of an overall rehabilitation program including therapeutic exercises, functional activities, pain management, and limb or stump protection.
What causes sensory loss, abnormal sensation, or hypersensitivity?
- Neurological injuries - like brachial plexus and sciatic nerve injuries
- Physical trauma - like large cuts, crush injuries, and even routine surgeries
- Limb amputations - like seen in some dogs that are hit by cars or those with osteosarcoma
Dogs with neurological injuries can suffer from partial or complete sensory loss (inability to feel a limb or body part).
Dogs with recent physical trauma can experience sensory loss or a variety of abnormalities (odd sensations) like tingling or burning (similar to the “pins and needles” feeling we get when our leg has "fallen asleep").
Dogs with limb amputations can experience abnormal sensations in the residual leg and stump. Hypersensitivity to touch at and near the stump area, an over-reaction to gentle touch, as well as pain are not uncommon and can be severe.
Abnormal sensations and nerve pain can last long after the limb or stump has healed. Observable signs that your dog may be experiencing sensory problems or pain are:
- excessive licking at the site of the injury
- self-mutilation - chewing or biting the injured area
- general anxiety/nervousness
- panting, whining or crying
- over-reacting to even gentle touch
Nerve injuries, including nerves that are affected by limb amputations, can cause havoc on the brain. The brain has an exact representation (a mental picture) of the body and how it moves. This "body picture" allows the brain to send messages to move the body part in very precise ways. If a dog wants to climb stairs or pick up a ball, the brain sends a message to the leg to lift just high enough to clear the step or the neck to bend and mouth to open just so much to pick up the ball.

Nerve injury or amputation can distort the brain's "body picture", and the brain's mental map no longer matches the physical body or what the body can feel. This causes nerves to overreact – they sort of “panic or short-circuit" trying to figure out where the body went or how to use it again because it’s not responding in the normal way. In other words, the brain’s signals are no longer working properly and cannot move the injured or missing limb because the limb's nerves are damaged or absent. The brain is not able to communicate properly with the body, and this miscommunication leads to odd or painful sensations in the body.
Traditional Treatments
There are a number of oral treatments that are useful for reducing nerve pain (e.g., Gabapentin, CBD). Please consult with your veterinarian about these and others.
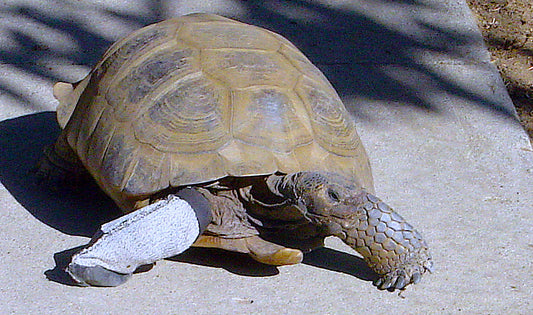
Dogs with nerve injuries that drag the injured/weakened limb are often bandaged to protect the limb from being traumatized when dragged or to prevent dogs from self-mutilating. The leg is kept bandaged until sensation and movement return, which can take a few weeks or months. Though covering and protecting an injured limb is extremely important, it is equally important to start exposing the limb to various sensations to "reawaken" the nerves.
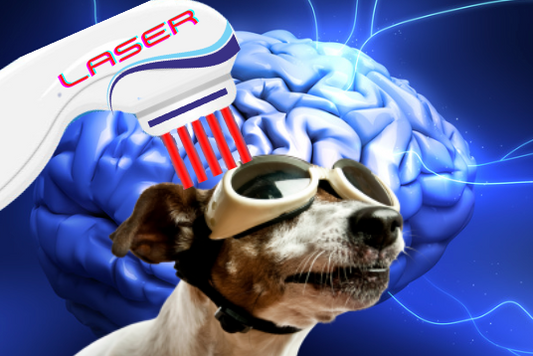
Remapping the Brain - How to Reduce Pain and Improve Mobility
Remapping the brain after a trauma or amputation helps it to make a new "body picture" and this can, in turn, helps reduce pain and:
- calm damaged nerves
- organize sensations
- reduce an overreaction to touch
Remapping the brain following a nerve injury can help to reduce pain and:
- awaken injured nerves
- make new brain connections to take over damaged pathways (brain plasticity)
- re-educate nerves to help them function more normally
- reduce re-innervation hypersensitivity
- promote healing and return to function

Sensory Re-education and Desensitization
Sensory re-education is a therapeutic program that uses different types of sensory stimuli to help remap the brain, retrain injured nerves, and stimulate new nerves to take over those that have been permanently damaged.
Desensitization is a therapeutic program that helps to calm hypersensitive nerves and reduce pain. It reintroduces hypersensitive areas to normal touch and temperature and helps the brain to relearn these during recovery.
The treatment protocols use various materials, thermal agents (warm, cold), vibration, and manual manipulation to educate the nerves. Protocols usually start with the softest, most gentle stimuli then proceed to tougher and rougher ones as the dog's nervous system learns and gets used to the sensations.
The Vital Vet Sensory Protocol below is useful for dogs with nerve sensitivity abnormalities and nerve-related pain. There are 4 Phases and the dog should be comfortable with all the stimuli in the first Phase before moving onto the next one. Don't worry about missing a treatment or two or even using ALL of the recommended stimuli. Just do the best that you can with the time that you have. Anything is better than nothing. But remember: Dogs benefit most from a program that is done each day and preferably 2-3 times per day. If you spend a few minutes petting your dog each day, it can be time spent helping to re-educate or desensitize nerves.
|
VITAL VET DESENSITIZATION AND SENSORY RE-EDUCATION PROTOCOL PRECAUTION: If the pet still has stitches be sure that the incision site is closed and avoid the area until the stitches are removed. You can still apply this Protocol near and around the suture area. |
||
|---|---|---|
| STIMULI | HELPFUL LINKS | |
| PHASE I - Repeat 3-5 times a day (wait several hours between applications). Move onto Phase II once the pet is comfortable with these materials (sensory stimuli). | ||
| Piece of silk or satin fabric |
Rub the residual limb and stump area with fabric. Use a gentle, circular motion for 1-2 minutes. For pets with neurological leg injuries and hypersensitivity, rub the entire leg and paw, making sure to include the paw pads and between the toes. For pets with neurological injuries without sensation (can't feel the limb), move directly to Phase II. |
|
| Cotton ball | Same as above using a cotton ball. For small dogs, try using a Q-tip to reach the space between the toes. | |
| PHASE II - Repeat 3-5 times a day (wait several hours between applications). Move onto Phase III once the pet is comfortable with these materials (sensory stimuli). | ||
| Soft cotton towel (non-textured) and dipped in warm water |
Dip the towel in warm water and ring out. Rub the residual limb and stump area with the towel. Use a gentle, circular motion for 1-2 minutes. For pets with neurological leg injuries, rub the entire leg and paw, making sure to include the paw pads and between the toes. DO NOT USE near areas of inflammation or infection. |
Super Soft Hand Towels Link |
| Massage | Massaging the limb and stump area helps the pet develop a tolerance for touch and pressure. Massaging should be gentle, firm, and with steady pressure (rather than a light tickle). As long as the stitches are closed, clean, and dry, you can gently massage the entire stump (avoid massaging directly over stitches). The stump area may be pretty tender at first but the more you massage, the more accepting your pet will be. Massage for just 1-2 minutes. If your dog has a nerve injury to the limb, make sure you massage the paw and toes as well. | Learn How to Massage |
| Piece of velvet or chenille |
Rub the residual limb and stump area with fabric. Use a gentle, circular motion for 1-2 minutes. For pets with neurological leg injuries, rub the entire leg and paw, making sure to include the paw pads and between the toes. |
|
| PHASE III - Repeat 3-5 times a day (wait several hours between applications). Move onto Phase IV once the pet is comfortable with these materials (sensory stimuli). | ||
| Piece of corduroy or flannel |
Rub the residual limb and stump area with fabric. Use a gentle, circular motion for 1-2 minutes. For pets with neurological leg injuries, rub the entire leg and paw, making sure to include the paw pads and between the toes. |
|
| Rough terry cloth |
As long as your dog tolerates the corduroy or flannel, you can start to apply more pressure with your strokes. Use the rough terry cloth and rub the inside of your own forearm first to gauge your pressure. Then use the same pressure on your dog. Again, use a circular motion for 1-2 minutes. For pets with neurological leg injuries, rub the entire leg and paw, making sure to include the paw pads and between the toes. |
Terry Cloth Link |
| Rough terry cloth dipped in warm water |
Dip the terry cloth in warm water and ring out. Rub the residual limb and stump area with the damp cloth. Use gentle strokes for 1-2 minutes. For pets with neurological leg injuries, rub the entire leg and paw, making sure to include the paw pads and between the toes. DO NOT USE near areas of inflammation or infection. |
Terry Cloth Link |
| Massage and Tapping | Massage as in PHASE II. Tapping - with fingertips, is another helpful desensitization technique. It is especially useful over the suture area (where stitches were) since this area can be hypersensitive. Use your index and middle fingers and, keeping fingers straight, gently tap over and around the sensitive area. Remember to tap with the pads of your fingers - do not use your fingernails. Continue tapping for 1-2 minutes. | Learn How to Massage |
| Rough terry cloth dipped in cool/cold water |
Dip the terry cloth in cool-to-cold water and ring out. Rub the residual limb and stump area with the damp cloth. Use gentle strokes for 1-2 minutes. For pets with neurological leg injuries, rub the entire leg and paw, making sure to include the paw pads and between the toes. DO NOT USE near areas of inflammation or infection. |
Terry Cloth Link |
| PHASE IV - Repeat 3-5 times a day (wait several hours between applications), unless otherwise indicated. | ||
| Toothbrush |
Rub the residual limb and stump area with the bristles of the toothbrush. Start out gently then apply slightly more pressure as the dog begins to get used to the sensation. Use a gentle, circular motion for just a few seconds per area. For pets with neurological leg injuries, use gentle brush strokes over the entire leg and paw, making sure to include the paw pads and between the toes. DO NOT USE near areas of inflammation or infection. |
|
| Smooth ice cube |
Wet the ice cube and quickly and lightly run it on the residual limb and stump area. For dogs with neurological leg injuries, run the ice cube quickly along the leg and paw. The point of this exercise is not to have the dog get used to the sensation but merely to feel a new sensation. This exercise should only be done for a few seconds per area, 1-2 times per day. DO NOT USE near areas of inflammation or infection. |
Check your freezer! |
|
Mini massager/ vibration tool |
Vibration is great for helping to reduce hypersensitivity and also for helping to re-awaken injured nerves. Use a vibration tool with a smooth, round head. Use gentle, circular motions for just a few seconds per area.
Vibration can also be useful for pets with neurological leg injuries. Use a gentle, circular motion for just a few seconds per area. This exercise should only be done once a day for a total of a few minutes. DO NOT USE near areas of inflammation or infection. |
Mini Massager Link |
| OTHER TOOLS AND TECHNIQUES | ||
| TENS | Transcutaneous electrical nerve stimulation (TENS) uses low-voltage electric current to treat pain. A small device delivers the current through pads that are placed at or near nerves. TENS reduces and even blocks pain messages. Each model is a little different so please read the instructions and consult your veterinary professional with questions. TENS can be used once the pet is comfortable with all of the materials used in Phase I. TENS alone is not useful for dogs with neurological injuries affecting the sensory system. | TENS Link |
| Assisi Loop (Targeted PEMF) | Pulsed electromagnetic field (PEMF) can help reduce pain and inflammation, and the Assisi Loop can target the therapy directly to the painful area. Since the PEMF signal is not really felt by the pet, the Assisi Loop does not provide any feeling other than the light pressure of the Loop device itself when it sits on the skin. Therefore, as long as the pet can tolerate the placement of the Loop on the body, this therapy can be used. The Loop still delivers its therapy if it is held slightly over the affected area or placed on a light cotton towel that is draped over the pet's stump or limb. | Assisi Loop Link |
| Weight-bearing exercises |
For dogs with neurological injuries of the limb (not amputation) - range of motion and weight-bearing exercises should be part of the rehab program recommended by your veterinary professional. Weight-bearing exercises help relieve pain and activate injured nerves. Pets must be able to have enough movement in their limb joints so that the leg can be placed in a weight-bearing position. If the limb is pliable (not too stiff), support the pet in standing then place the paw in the normal standing position if possible. Please ask your veterinarian or physiotherapist for assistance. |
To find the nearest Veterinary Professional in your area, click here |
A Few More Tips
Pets with limb amputations or limb injuries can lose their balance or slip easily on tile or wood floors. Check out this helpful article on great traction aids and ideas. In addition, harnesses are beneficial for supporting 3-legged pets and helping them walk and climb stairs. See this section on harnesses for amputees.
CONCLUSION
Nerve pain is not uncommon following amputation or nerve injury. Abnormal sensations can be quite confusing and even painful for a pet. Re-educating and desensitizing the limb or stump goes a long way toward helping your pet recover, regain function, and reduce the need for pain medications. Sensory recovery can take several weeks or months since the brain needs to adjust to the injury and form new pathways. But a thoughtful sensory program can be easily done at home, each day, and only takes a few minutes.
Pets differ in their sensitivity to injury and ability to tolerate different stimuli. There are no set rules for how quickly pets proceed through the Protocol detailed above. Take your time and let your dog be your guide to know when it's OK to move onto the next Phase. Remember that the more regularly this Protocol is performed, the better the results.
The information presented is intended for general information and educational purposes. It is not intended to replace the advice of your veterinarian or physiotherapist.
Author: Ilaria Borghese, MS, MA, OT
Other Related Publications
A Vital Vet Publication
Let’s work together and give them the best life possible!
contains affiliate and/or partner links-read